1. For black and white images, make sure the image mode is set to RGB. For color images, use RGB or CMYK based on your preference.
2. Go to "Page Setup" to choose paper size and orientation.

3. Set your paper size (1) and orientation (2) in the page setup dialog. If you are using a roll, select "Custom Paper Size" in the "Page Attributes" menu, and manually input your desired dimensions. Click "OK" when done.


4. Choose "Print with Preview" from the "File" menu.
In the dialog that opens,
1) Check photo placement on the page
2) Set a border if you want one.
3) Click print.

4. Before you print, go to "Printer Features" under "Copies & Pages."

5. Set the paper source (1) and then switch to the second set of features (2) to set paper type.
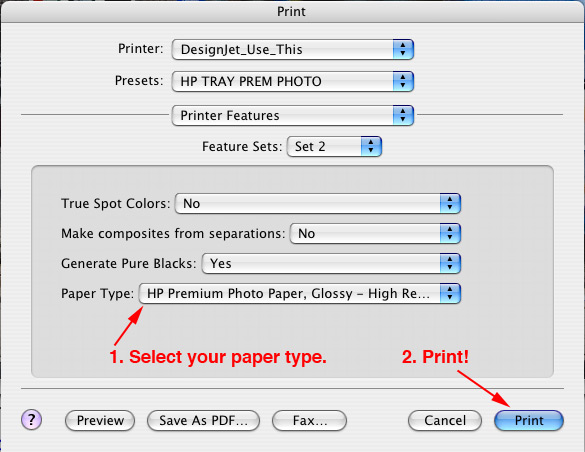
6. Set your paper type (1). This can be found on the box of paper you bought.
Print (2)!